金属成分は、酸素、水分、高温、機械的摩耗への暴露により、時間とともに加齢と変色する傾向があります。研磨は、腐食開始部位を最小限に抑え、表面汚染を防ぐ鏡の滑らかな表面を作成します。結果として得られる仕上げは、装飾的な魅力を高め、光学反射器などの機能的使用に高い反射率を提供します。さらに、表面の不規則性を除去することにより、研磨はストレス濃縮器として作用するマイクロノッチを排除し、それによって疲労寿命を改善します。
この記事では、磨きの重要な手順と方法を取り上げ、その利点と一般的なアプリケーションを調査し、パフォーマンスと外観の両方を維持するための実用的なヒントを共有します。
研磨仕上げとは何ですか?それはどのように機能しますか?

研磨は研磨剤を使用して、徐々に欠陥と傷を除去します機械加工部品、滑らかで反射的な表面を達成することを目指しています。材料と望ましい結果に応じて、さまざまな手法を適用できます。たとえば、機械的研磨は一般に金属に使用されますが、化学的方法は特定の種類の石、ガラス、またはプラスチックに適しています。
材料や仕上げの品質に関係なく、研磨プロセスは通常、いくつかの重要なステップに従って、粗い表面を鏡のような仕上げに変換します。
ステップ#1:ラフ化
粗い粉砕から始めて、機械加工、溶接、鋳造から大きな表面の不規則性と深い傷を除去します。 40〜60のグリットディスクまたはベルトを備えたアングルグラインダーまたはベルトサンダーを使用して、高スポットをすばやく倒します。次に、120〜240のグリットサンドペーパーを搭載したランダムな軌道サンダーに切り替えて、表面を平準化し、残りの研削マークを消去します。
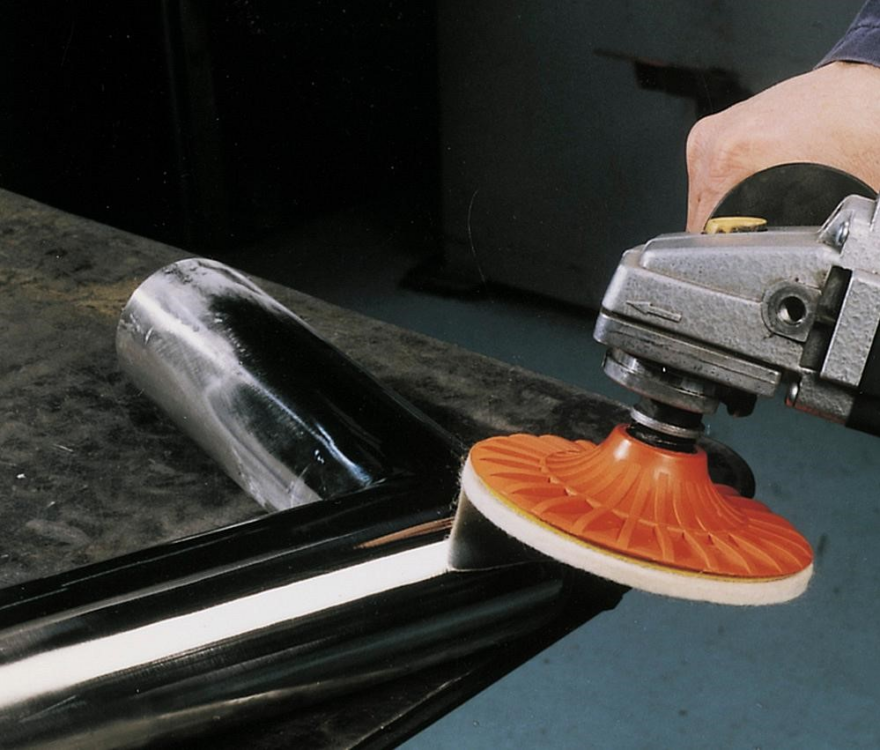
ステップ#2:研磨
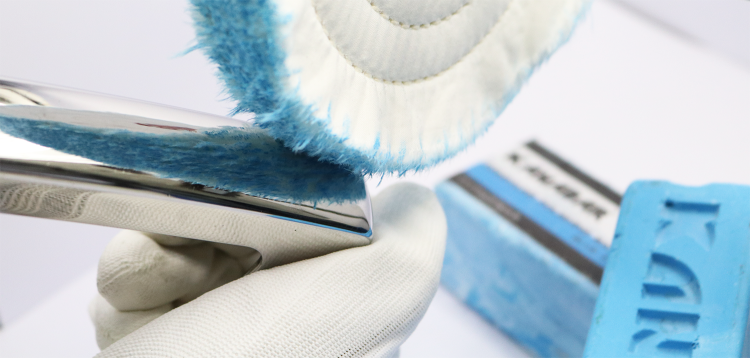
ラフ化後、ベンチポリッシャーまたはハンドヘルドロータリーツールに取り付けられたウールバフボンネットまたは綿バフングホイールを使用して、切断コンパウンドを部品に塗ります。粗い化合物が残りの傷を除去したら、徐々に細かい研磨化合物を搭載した泡の磨きパッドまたはより細かい布ホイールに切り替えて、マイクログロブを消去し、鏡のような光沢を作ります。きれいなマイクロファイバークロスで表面を拭いて仕上げて、化合物残基を除去し、均一で高反射の仕上げを検証します。
ステップ#3:バフまたはブライトニング
研磨後、部品にはわずかなヘイズまたはマイクロスクラッチがある場合があります。鏡のような仕上げを均一にするために、柔らかい布のホイールをマウントしたり、ポリッシャーにモップをバフしたりし、hazeが消えるまで、均一な圧力で明るい明るい化合物を塗ります。この最後のバフステップは、表面の明るさをさらに強化し、一貫した高反射の仕上げを実現します。
ステップ#4:保護
洗練された仕上げを保持するには、保護ワックス、オイル、または透明なラッカーの薄いコートを塗り、表面を密封します。この層は、輝きを維持し、水分と汚染物質を遮断し、コンポーネントのサービス寿命を延長するのに役立ちます。このステップを含め、選択したコーティングを含めるかどうかは、部品の材料、動作環境、耐久性の要件に依存します。
さまざまな種類の研磨方法とその長所と短所
機械的研磨
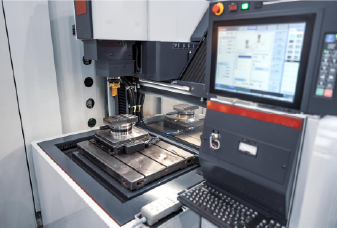
これは、金属加工で最も一般的な仕上げ技術であり、通常は化学または電解の研磨に先行します。研磨ツールとワークピースの間の直接接触に依存して、材料を除去し、傷、ツールマーク、およびその他の表面欠陥を滑らかにします。手作業で、またはベンチポリッシャー、アングルグラインダー、研磨界のベルト、ディスク、ホイール、パッドを備えた軌道サンダーなどの駆動装置で行うことができます。
長所
- 表面のテクスチャと光沢を適切に制御します
- 重い欠陥とバリの効果的な除去
- 低い機器コストと広く利用可能なツール
- 金属で真の鏡仕上げを達成することができます
- ストレス集中を減らすのに役立ちます
短所
- 労働集約的であり、時間がかかる可能性があります
- 部品を歪めたり変色させたりする可能性のある熱を生成します
- 不均一な領域や渦巻きマークを避けるためにオペレータースキルが必要です
- 複雑な幾何学と柔らかい素材に挑戦します
化学研磨
化学研磨では、ワークピースは制御されたバスに浸され、その溶液は顕微鏡的な高スポットを選択的に溶解し、表面の粗さを滑らかにして均一な明るい仕上げを生成します。お風呂の温度、濃度、および浸漬時間を調整することにより、このプロセスは機械的な摩耗なしでタイトまたは複雑な形状を扱うことができます。
長所
- 機械的接触なしで均一な仕上げを提供します
- ツールがアクセスできない内部チャネルと複雑な形状に到達します
- 複数の部品のバッチ処理を一度に許可します
- ワークやツールに機械的なストレスはありません
- 清潔で不活性化された表面を残すことにより、耐食性を改善します
短所
- 有害化学物質の取り扱いと廃棄を伴います
- 機械的な方法と比較して、細いテクスチャの制御が少ない
- バスパラメーター(温度、時間、濃度)は、過剰な取得を避けるためにしっかりと管理する必要があります
- 反応を停止し、ポストエッチング腐食を防ぐために、徹底的なすすぎと中和が必要です
電解研磨(エレクトロポリッシング)
しばしばの逆と見なされます電気めっき。金属を堆積する代わりに、ワークピースは酸電子液の正の電極(アノード)として機能し、カソードを並べて配置します。 DC電流が流れると、金属イオンはアノードの顕微鏡的高スポットから優先的に溶解し、表面を明るい鏡のような仕上げに滑らかにします。
長所
- 非常に低いRA(表面粗さ)と機械的研磨よりも優れた鏡のような光沢を達成します
- 埋め込まれた不純物を除去することにより、耐食性を改善します
- 部品やツールに機械的な応力はありません
- 内部穴、チャンネル、その他の隠された機能に到達して磨くことができます
短所
- 特殊な機器(DC電源、酸耐性タンク、ろ過)および危険な化学物質の慎重な取り扱いが必要です
- 電気的に導電性金属でのみ動作します
- 深い穴や不規則な幾何学に必要な複雑な固定具(カスタムカソードまたはジグ)
- 治療前後の徹底的な要求(脱脂、すすぎ、中和)
蒸気研磨
蒸気研磨は、主に透明または半透明のプラスチック、特に3DプリントされたABS、PMMA、またはPCで使用され、光学的透明度と表面の滑らかさを改善します。部品は、溶媒蒸気(アセトンやジクロロメタンなど)が表面層のピークを静かに溶かし、機械的耐摩耗性のない層を消去する密閉室に配置されます。
長所
- 特に透明な材料に効果的です
- 手動サンディングと比較した高速サイクル時間
- 非接触プロセス、繊細または複雑な形状に適しています
- マイクロポーシングを滑らかにして密閉し、耐薬品性を改善し、洗浄の容易さ
短所
- 過度の露出と変形を避けるために、正確な制御が必要です
- 適切な換気とPPEを必要とする有害な溶媒蒸気が含まれます
- 溶媒互換プラスチックに限定されています。すべてのポリマーには適用されません
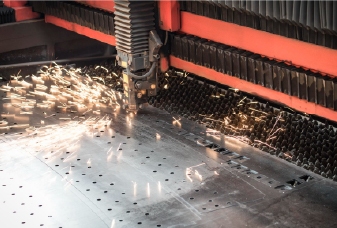
研磨表面仕上げのアプリケーション
高度に磨かれた表面は滑らかで、摩擦を減らし、可動部品間の摩耗を減らします。また、この滑らかさにより、表面は細菌を抱く可能性が低くなり、きれいにしやすく、汚染のリスクを減らします。
さらに、磨かれた金属の明るさは光の反射率を高め、しばしば贅沢と品質にリンクし、熱を反射し、熱管理を支援します。これらの利点により、以下を含む、業界全体で幅広いアプリケーションが可能になります。
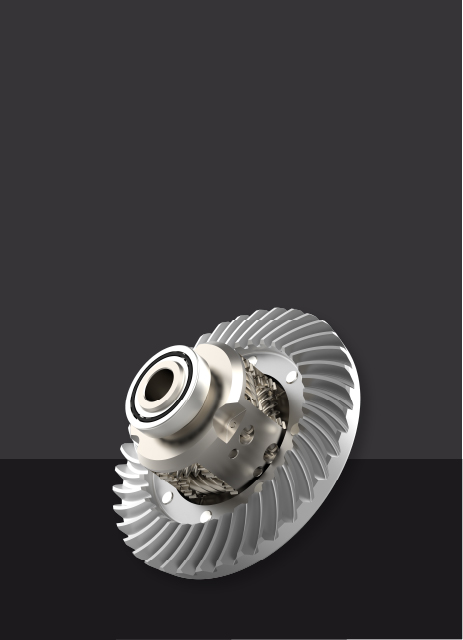
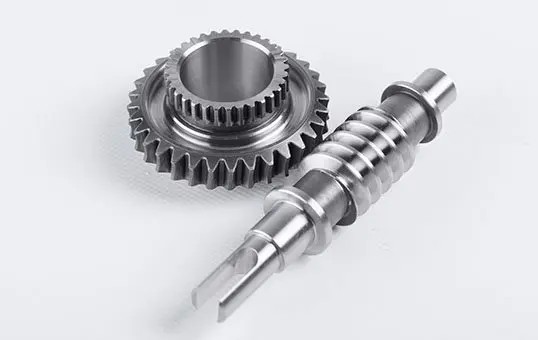
- ギア、ベアリング、バンパー、リム、トリムなどの機械的コンポーネントと自動車部品。
- 手術器具やインプラントを含む医療機器。
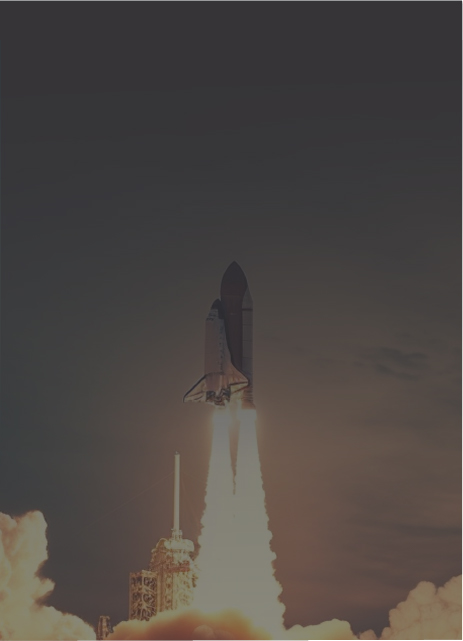
- ジェットエンジンの洗練されたタービンブレードなどの航空宇宙コンポーネント。
- 流体流量システム、特にパイプラインと流体処理航空宇宙部の内部表面。
- 照明システムと、望遠鏡ミラーや自動車ヘッドライトを含む光学装置。
- 食品接触表面から宝石や時計まで、消費財。
仕上げ仕上げのための仕上げグレードオプション
さまざまな産業や地域では、さまざまなシステムを使用して、洗練された表面グレードを分類しています。仕上げを指定する2つの一般的な方法は、研磨グリットのサイズ(表面粗さと相関する)と視覚的光沢です。典型的な分類を以下に示します。
| 仕上げグレード | グリットサイズ(ANSI) | 説明 |
| 粗い | 40-60 | 大きな傷と溶接マークを取り除くための重い研磨 |
| 中くらい | 80-120 | 適度な滑らかさのための標準的な研磨 |
| 大丈夫 | 180-240 | より滑らかな表面を実現するための細かい研磨 |
| とてもいい | 320-1200 | 非常に滑らかまたは近い環状仕上げのための超洗練された研磨 |
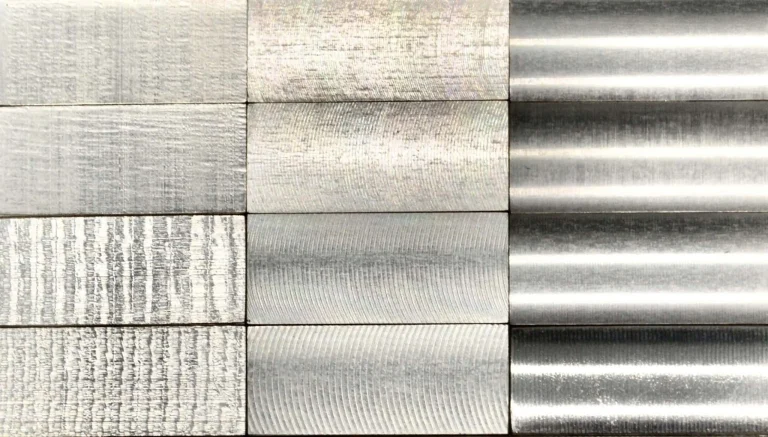
グリットサイズによる表面粗さ| 学年 | 光沢の説明 | 典型的なアプリケーション |
| マット | 光を拡散させる控えめな光沢 | ハードウェア、まぶしさを最小限に抑える必要があるアートインスタレーション |
| サテン | 低光学、落ち着いた外観 | インテリアデザイン要素、アプライアンスパネル |
| 明るい | 反射的な光沢 | 自動車のディテール、ジュエリー、消費者向けトリム |
| ミラーブライト | 非常に高い、完璧な反射率 | 光学装置、鏡、ハイエンドの装飾品 |
視覚的光沢グレード研磨で最適な結果のヒント
一貫して滑らかでミラー品質の仕上げについては、これらのベストプラクティスを考慮してください。
適切な研磨手法を選択します
最良の方法は、素材、一部のジオメトリ、希望の仕上げ、バッチサイズに依存します。ほとんどの金属では、機械的研磨はツールマークを削除するための直接制御を提供しますが、化学物質の研磨またはエレクトロポリ酸塩は、接触せずに明るい腐食抵抗性の光沢を提供し、隠されたチャネルに到達します。蒸気研磨により、透明なプラスチック上の層の線が消去されます。振動仕上げは大きなバッチを効率的に処理し、ハンドツールまたは溶媒蒸気は1回限りのプロトタイプに最適です。
正しい研磨剤とツールを使用します
各研磨段階に合わせて研磨剤を選択します:重度の欠陥除去のために40〜80のグリットベルトまたはディスク、表面の滑らかに120〜240グリットパッド、最終グロス用の柔らかい綿またはフォームホイールの400〜800グリット。さらに、部品の形状に合わせてパッドの剛性を選択します。これは、平らな領域用の際立ったパッドと、曲線や輪郭の柔軟で柔軟なパッドです。最後に、各グリットのツール速度と圧力を調整します。RPMSの低下と軽い圧力は、過熱を防ぎ、研磨寿命を延ばします。
手順の合間にクリーニングします
各研磨段階の後、グリッツを切り替える前にすべての残留物を取り除きます。糸くずのない布と少し溶媒(イソプロピルアルコールなど)で部品を拭き、圧縮空気で溝をきれいにします。複雑な形の場合は、温水と穏やかな洗剤ですすぎ、完全に乾燥させます。これにより、粗い粒子が新しい傷を引き起こすのを防ぎ、各グリットが一貫した滑らかな仕上げのために効果的に機能することを保証します。
定期的に検査して測定します
キーステージでの定期的なチェックは、部品を仕様に合わせて、やり直しにしないようにします。各グリットステージの後、良い照明の下で表面を調べるか、ルーペを使用して、スクラッチの除去や光沢さえ確認します。ポータブルプロファイロメーターまたはスタイラステスターを使用して粗さを測定してRAを検証し、キャリパーまたはマイクロメーターを使用して重要な寸法を確認します。オフターゲットの仕上げや寸法逸脱を早期にキャッチすると、圧力、速度、または研磨性のグリットをすぐに調整し、研磨プロセスが軌道に乗っていることを確認できます。
プロセスを文書化します
研磨プロセスを文書化するときは、毎回釘付けしたいレシピのように扱います。部品ID、日付、および演算子を記録し、使用した正確なツールと研磨剤(マシンタイプ、パッドまたはホイール素材、および各段階でのグリットサイズ)に注意してください。圧力設定、スピンドルスピードまたはハンドツールRPM、および各グリットに費やした時間を書き留めます。研磨後、ログは表面視線値を測定し、発見した欠陥、およびどのような調整を行ったかを測定しました。これらの詳細を共有形式で保持するため、シンプルなスプレッドシートであろうとデジタルフォームであろうと、勝利セットアップを再現し、物事がうまくいかないときにパターンをスポットし、新しいチームメンバーをより速く訓練できます。
結論
研磨面があなたの製品の審美的な魅力を高めると、それは彼らの機能も改善します。 Chiggoでは、これを理解しており、プロトタイピングビジョンを実現する準備ができています。高品質を提供していますCNC加工3D印刷サービス、磨かれた表面仕上げを含む最上層仕上げ。競争力のある価格で予想される結果を保証します。すぐに見積もりについては、今すぐお問い合わせください!
磨き面の仕上げFAQ
研磨化合物とは何ですか?
研磨化合物は、培地に混合された細かい研磨粒子を含む物質であり、ペースト、バー、液体、または粉末の形である可能性があります。通常、オブジェクトの表面仕上げを滑らかに改善するために、ホイール、パッド、布などの研磨ツールと組み合わせて使用されます。
バフと研磨の違いは何ですか?
研磨は、表面の欠陥を滑らかにし、表面を準備するために使用されるプロセスであり、通常はより粗い研磨剤を使用しています。それは均一な仕上げを作り出しますが、必ずしも輝きを追加するわけではありません。一方、バフは、研磨後に行われ、より柔らかいホイールを備えたより細かい研磨剤を使用して、高光沢または鏡のような仕上げを実現します。
研磨は表面の平準化に焦点を当てていますが、バフは輝きを高めることを目的としています。
ブラッシングと研磨の違いは何ですか?
ブラッシングと研磨はさまざまな目的を果たし、独特の仕上げを生み出します。ブラッシングは、耐久性を向上させ、欠陥や指紋を隠すのに役立つ、テクスチャのマット仕上げを作成します。対照的に、研磨は非常に反射的で滑らかな表面を生成し、表面の質と外観の両方を改善します。
研磨と仕上げの違いは何ですか?
研磨と仕上げは関連していますが、同一の用語ではありません。仕上げは、洗浄、討論、コーティング、塗装、陽極酸化など、機械加工または製造後の部品の表面を改善するために使用されるすべてのプロセスをカバーする広範な用語です。研磨は、特に研磨剤を使用して粗さを減らし、均一で光沢のある外観を作成するために研磨剤を使用して表面を滑らかにして明るくすることを目的とした仕上げプロセスの1つにすぎません。要するに、すべての研磨は終了していますが、すべての仕上げが研磨されているわけではありません。